How to Clean an Ultrasonic Cleaner for Best Results?

Time:2026-05-19 Author:Isabella
0%

Cleaning an ultrasonic cleaner properly is essential for achieving optimal results. Those small machines can handle a variety of cleaning tasks. However, improper maintenance can lead to poor performance. Understanding how to clean an ultrasonic cleaner effectively ensures its longevity and efficiency.

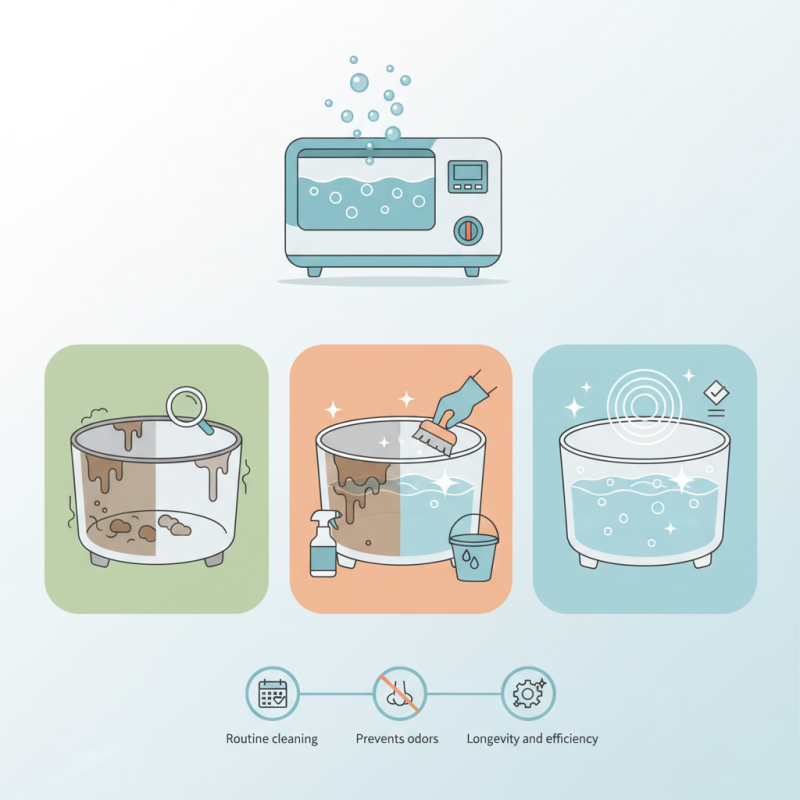
When using an ultrasonic cleaner, residues can accumulate over time. This buildup affects cleaning performance. For best results, routine cleaning is necessary. Regular maintenance prevents unwanted odors and debris. Even the best machines require attention and care.

Many users overlook the cleaner’s tank. This area can harbor grime if neglected. It's vital to check the solution regularly. A dirty tank can compromise cleaning quality. Reflecting on your cleaning habits can reveal areas for improvement. Fixing these can lead to enhanced effectiveness in cleaning.

How to Clean an Ultrasonic Cleaner for Best Results?

Understanding the Importance of Cleaning an Ultrasonic Cleaner Regularly

Cleaning your ultrasonic cleaner regularly is crucial for optimal performance. Over time, residues and contaminants build up in the tank. This can hinder cleaning efficiency and potentially damage the machine. A clean ultrasonic cleaner ensures that your items are being treated properly. Following a routine cleaning schedule helps prevent any long-term issues.

To maintain your device, use a gentle cleaning solution specifically designed for ultrasonic cleaners. Warm water often works well too. Ensure you rinse the tank thoroughly to avoid unwanted residue. Regularly check for any debris or particles that may affect the cleaning process.

Tips: After cleaning, run a short cycle with just water to flush the system. This ensures that any leftover cleaning solution has been fully removed. Also, try not to leave items in the solution for too long, as this can wear on both the items and the machine. Enjoy the benefits of a properly maintained ultrasonic cleaner. Your equipment will last longer, and your results will improve.

Choosing the Right Cleaning Solution for Optimal Performance

Choosing the right cleaning solution for your ultrasonic cleaner is crucial. A suitable solution ensures efficient cleaning and enhances performance. Consider the type of items you clean. Metals, plastics, and glass may require different formulations.

Typically, a water-based solution works well for general cleaning tasks. Yet, stubborn contaminants often need something more potent. Enzymatic cleaners are effective for organic debris, while degreasers tackle oily residues. Adjust your solution based on the specific dirt you're facing. It's not a one-size-fits-all approach.

Remember, concentration matters. Too strong a solution can damage delicate items. Too weak may not yield satisfactory results. Regularly testing the solution effectiveness is wise. Engage with your ultrasonic cleaner's nuances. Taking time to reflect on what works and what doesn’t can lead to better practices.

Step-by-Step Guide to Cleaning Ultrasonic Cleaner Components

Cleaning an ultrasonic cleaner is essential for maintaining optimal performance. The process involves several key steps that ensure each component functions efficiently. Begin by unplugging the device and allowing it to cool down. Next, empty any residual cleaning solution. This step is crucial; leftover liquid can affect future cleaning cycles.

Once emptied, inspect the tank for any debris or stains. Using a soft cloth and a mixture of warm water with mild detergent, gently scrub the tank’s interior. Avoid abrasive materials, as they can scratch the surface. Pay attention to the ultrasonic transducer; it should be free of grime for effective operation. Rinse thoroughly to eliminate any soap residues.

For the accessories, such as baskets or lids, a similar cleaning approach applies. A toothbrush might be handy for tight spaces. After rinsing, let everything air dry completely. Regular cleaning prevents buildup that can hinder performance. If your equipment appears stubbornly dirty, consider soaking it overnight in a diluted vinegar solution. Adhering to these steps contributes to a lasting and effective cleaning experience.

Ultrasonic Cleaner Component Cleaning Frequency

Maintaining Frequency and Duration for Effective Cleaning Results

To achieve effective cleaning results with an ultrasonic cleaner, maintaining the correct frequency and duration is crucial. Ultrasonic cleaners operate by generating sound waves at specific frequencies. Typically, a frequency range of 20 kHz to 40 kHz is common. Higher frequencies often clean delicate items, while lower frequencies are better for tougher contaminants. However, factors like the type of cleaning solution and the material of the items also play a role in determining the best frequency.

Duration is equally important. Most cleaning cycles last between 3 to 10 minutes, depending on the level of dirt and the item being cleaned. Overexposing items to ultrasonic waves can lead to undesired effects, such as surface damage or loss of detail. Observing the cleaning process can guide adjustments in time. Sometimes, a longer cycle might be necessary for heavily soiled items. However, this requires careful monitoring to prevent potential harm.

Reassessing time and frequency can be an ongoing experiment. It is important to document these adjustments for consistency. When results are unsatisfactory, consider re-evaluating both the frequency settings and cleaning duration. This approach fosters a deeper understanding of how ultrasonic cleaning works while optimizing your cleaning experience. Don't hesitate to try different combinations for various materials, as it may yield better outcomes.

Tips for Avoiding Common Cleaning Mistakes in Ultrasonic Devices

Cleaning an ultrasonic cleaner is crucial for optimal performance. However, many users make frequent mistakes. Some of these errors can lead to ineffective cleaning or even damage to both the device and the items being cleaned.

One common mistake is using the wrong cleaning solution. Some solutions can be abrasive, which can harm delicate items. Always check the compatibility of the solution with both the cleaner and the materials you are cleaning.

Another mistake is overfilling the cleaner. While it may seem like more liquid means better cleaning, this can lead to subpar results. Ensure the items have enough space to move freely in the ultrasonic bath.

Additionally, neglecting to regularly clean the ultrasonic cleaner itself can lead to build-up. This residue can affect performance. After each use, take a moment to rinse the tank and dry it properly. Even a small mess can impact future cleaning sessions. Remember, a little diligence goes a long way in maintaining the efficiency of your ultrasonic device.

FAQS

: Why is cleaning an ultrasonic cleaner important?

: Cleaning ensures optimal performance and efficiency of the ultrasonic cleaner. Neglect can lead to poor results.

What should I do before cleaning the device?

Unplug the device and let it cool down. This prevents accidents and ensures safe cleaning.

How should I clean the tank?

Use a soft cloth with warm, soapy water to scrub the tank. Avoid abrasives to prevent scratches.

Can I use any cleaning solution?

No. Make sure the cleaning solution is compatible with both the device and the materials.

What happens if I overfill the cleaner?

Overfilling can restrict movement and result in ineffective cleaning. Always allow space in the tank.

How can I clean stubborn dirt in the cleaner?

Soak components overnight in a diluted vinegar solution for effective removal of tough stains.

How often should I clean the ultrasonic cleaner?

Clean it after each use. Regular maintenance prevents build-up that affects performance.

What tools can assist in cleaning tight spaces?

A toothbrush is useful for reaching narrow areas and ensuring a thorough clean.

What is a common mistake when using an ultrasonic cleaner?

Neglecting to clean the device regularly can lead to residue build-up and lower efficiency.

How should I dry the components after cleaning?

Allow all cleaned parts to air dry thoroughly. Proper drying prevents moisture-related issues.

Conclusion

Cleaning an ultrasonic cleaner is essential for maintaining its performance and longevity. Understanding the importance of regular cleaning helps prevent contamination of items being cleaned and ensures optimal results. To clean an ultrasonic cleaner properly, one must choose the right cleaning solution tailored to the specific items being processed. A step-by-step guide involves disassembling components, rinsing, and using the appropriate solution for ultrasonic cleaning.

Maintaining a consistent frequency and duration for cleaning ensures that the ultrasonic device operates effectively over time. Additionally, avoiding common cleaning mistakes, such as using incompatible solutions or neglecting to clean certain parts, is crucial for achieving the best results. By following these guidelines, users can ensure their ultrasonic cleaner remains efficient and delivers the desired cleaning outcomes.

Isabella

Isabella

Isabella is a dedicated marketing professional with a sharp focus on driving brand growth and engagement through strategic content creation. With an extensive background in digital marketing, she combines her passion for storytelling with her keen understanding of industry trends to deliver......